For those who got the Pro Upgrade you have the ability to add a section for your blog posts to show. Let's do it step-by-step:
A. Creating a Post
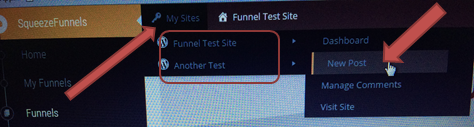
In the builder point your cursor to My Sites located at the top of the page. Sites you have created will show in the drop down. Point your cursor to the site you would like to add a post into. Another set of choices will show, click on New Post.
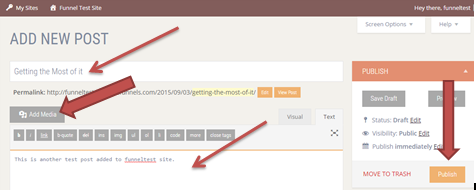
You will then be taken to a page where you will start writing your post. To add an image just click on the Image button. You can either save it as draft or publish it.
B. Adding a post section into a page/template
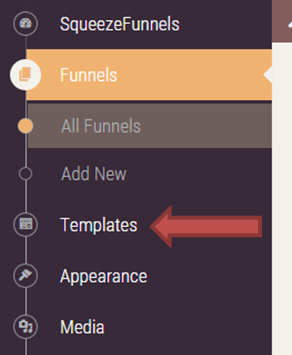
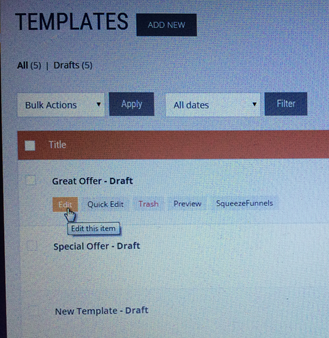
Go to the Templates > All Templates
Point your cursor to the page/template where you want to add a blog post section into and click Edit button.
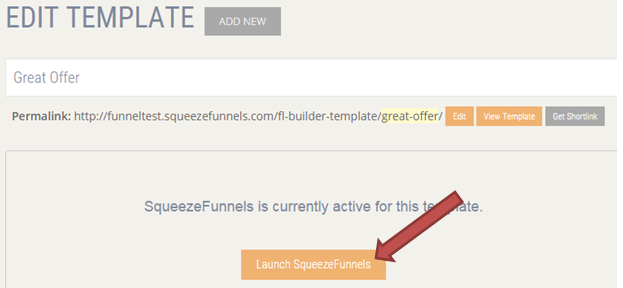
In the edit page click the Launch SqueezeFunnels button to access the modules and tools.
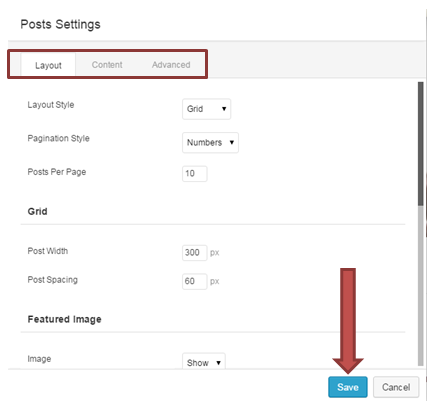
Click the down arrow of Pro Modules to expand it. Drag Posts and drop it where you want it to go in your template.

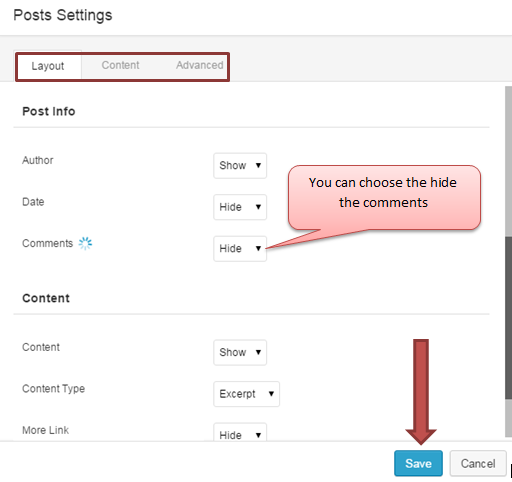
A pop-up post settings will open. Set how you want your posts to show. You can also choose to either hide or show the comments of your posts. Make sure you to click the Save button once you are done.
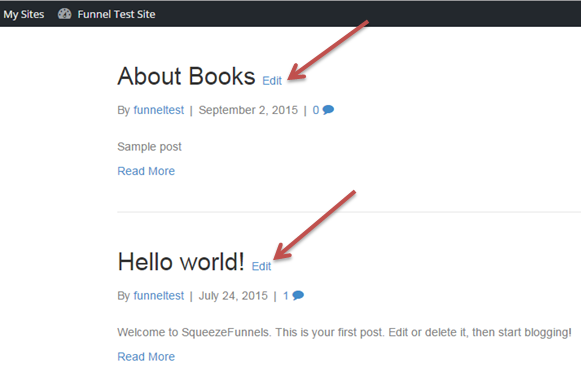
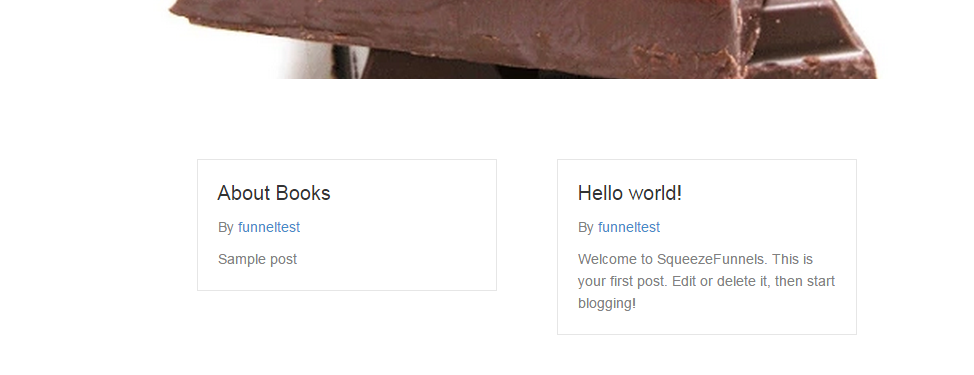
In this sample here's how the post looks like. If you don't like how you have set your posts, you can edit the settings.
C. How to Edit the Posts
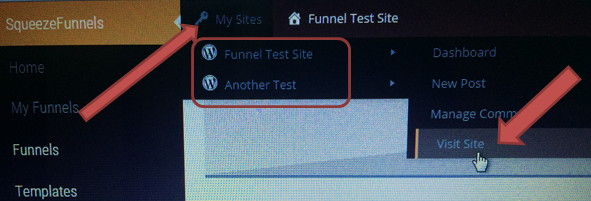
Go to My Sites > point cursor to the site where you want to edit the posts > Visit sites
In the page that opens you will see the list of posts you have. Click the Edit button to edit then hit Publish to save your changes.